SUPPLIES I always start on real paper, even when I am working digitally. For this project I did the sketch and the line work on paper, below are the supplies I use for these stages, (Pencil and eraser for the sketch, Microns for the lines, Sharpie Magnum to fill large black areas and a white gel pen and white out to fill errors and add detail back into the black)

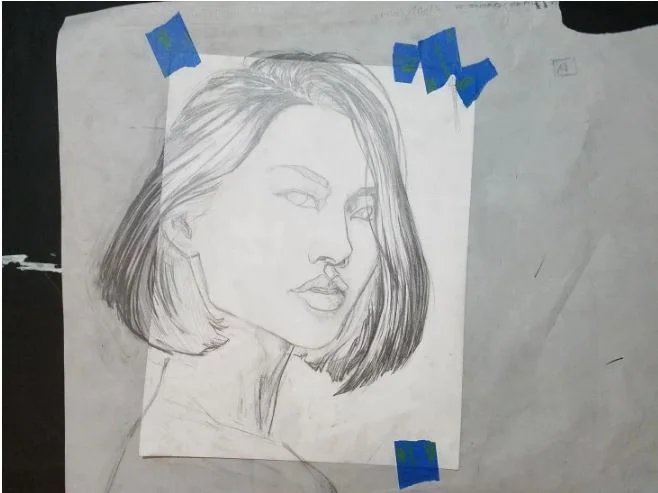
SKETCH I started the sketch in my sketchbook. I liked how it was turning out, so I decided to make it into a full illustration. To do this I had to EXPAND THE PICTURE PLANE. I taped the page to a larger sheet and let my sketch continue onto the larger sheet. NOTICE, even though I am not applying values until the digital portion, it is still important to pay attention to lights and shadows while creating this preliminary drawing.
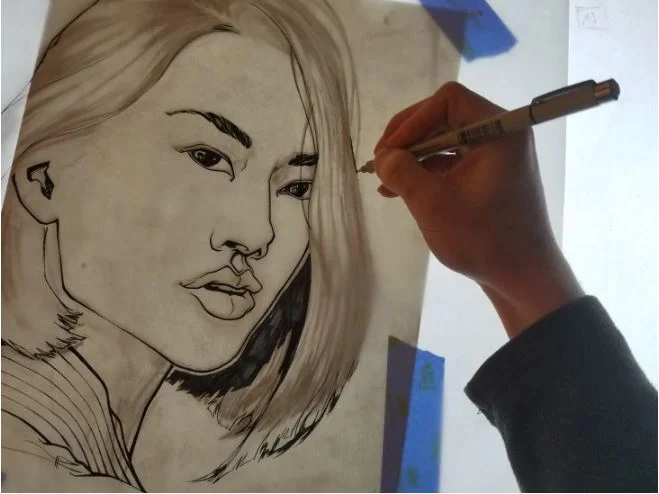
LINE-WORK Once the sketch is worked out I can begin the line work. I tape a piece of VELUM over the sketch(velum is fancy tracing paper, cant recommend it enough). I use a light table so I can see the sketch clearly through my tracing paper.
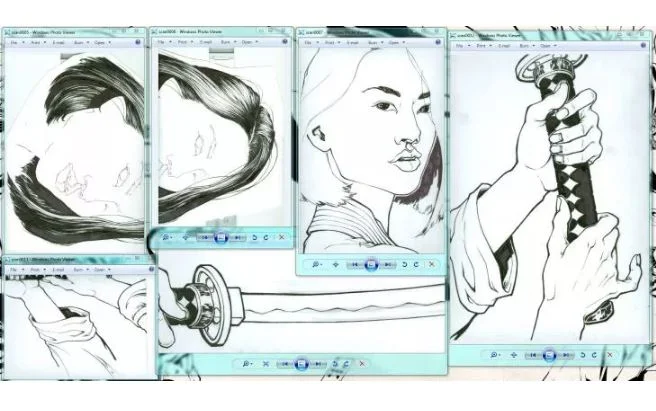
SCAN / PHOTOGRAPH The finished line work needs to be transferred to a digital format, for this stage you can either scan or photograph your work. I always scan to avoid distortion. This image was large and required 6 different scans.
PHOTOSHOP Using photo shop I combined all the fragmented pieces from the scanning process. I also a few important tools to clean up the artwork. I use the white paintbrush to remove things like smudges, eraser shavings, or mistakes. Perhaps most importantly , I then use the LEVELS tool to balance the blacks and Whites and eliminate unwanted grey-tones.

STARTING COLOR Its easiest to start by filling in each part with one solid color. once every thing is blocked in, perfect the color scheme by swapping out the solid areas of color until you get a color scheme you like.

LAY IN VALUES During this stage I reference the lighting decisions that I made previously while working on the sketch. I am not concerned with detail or smooth painting, just basic areas of light and shadow

REFINE COLOR Now that I have a basic road map for my values structure I will refine the painting methodically one part at a time until everything is rendered to my liking. During this stage pay close attention to EDGES, by this I mean the edges of shadows, particularly if they are HARD or SOFT.
HARD – Cast shadows will create sharp edges, I.E. the shadow on her neck cast by her jaw. A good real world example of this would be is “shadow puppets”.
SOFT – this type of edge is created from the surface o f a form turning away from a light source, I.E. the soft transition to shadow on her chin. Think about sun lighting the earth. As the surface turns away form the sun it get gradually darker until night when it is in complete darkness.

AND…. DONE,
HOPE THIS WAS HELPFUL, thanks for reading.